AWS EC2 instance using AWS Cloud Development Kit
Summary
Introduction
AWS Elastic Compute Cloud is one of the main block services of AWS. It is a web service that provides secure, resizable compute capacity in the cloud. It is designed to make web-scale cloud computing easier for developers.
AWS Cloud Development Kit is a powerful tool that allows us to write our infrastructure as code with our favorite programming languaje. In this post, I am going throught by a step by step tutorial to deploy our first EC2 machine using the default Virtual Private Cloud.
Architecture

In the above architecture, we have a load balancer that distributes incoming traffic across multiple EC2 instances. You can add and remove instances from your load balancer as your needs change, without disrupting the overall flow of requests to your application.
Requirements
- An AWS account and AWS CLI configured on your computer
- Some knowledge about AWS services like EC2, VPC, IAM, etc.
- A basic knowledge of Linux commands
- CDK CLI and Terraform installed on your computer
- An IDE or text editor, I will be using Visual Studio Code
Using CDK
The AWS Cloud Development Kit (AWS CDK) is a framework to model and provision your cloud application resources using familiar programming languages. AWS CDK provisions your resources in a safe, repeatable manner through AWS CloudFormation.
- Bootstrap an application using CDK CLI
mkdir load-balancing-aws
cd load-balancing-aws
cdk init app --language typescript- In the
libfolder, in the generated fileload-balancing-aws-stack.ts, add the following code:
import * as cdk from "aws-cdk-lib";
import { Construct } from "constructs";
import * as ec2 from "aws-cdk-lib/aws-ec2";
import { readFileSync } from "fs";

export class LoadBalancingAwsStack extends cdk.Stack {
  constructor(scope: Construct, id: string, props?: cdk.StackProps) {
    super(scope, id, props);

    // Set up the default VPC for the region
    const vpc = ec2.Vpc.fromLookup(this, "VPC", {
      isDefault: true,
    });

    // Create a security group with all outbound traffic allowed
    const securityGroup = new ec2.SecurityGroup(this, "SecurityGroup", {
      vpc,
      description: "Allow SSH (TCP port 22) and HTTP (TCP port 80) in",
      allowAllOutbound: true,
    });

    // Allow SSH and HTTP traffic in from anywhere
    securityGroup.addIngressRule(
      ec2.Peer.anyIpv4(),
      ec2.Port.tcp(22),
      "Allow SSH access from the world"
    );

    // Allow SSH and HTTP traffic in from anywhere
    securityGroup.addIngressRule(
      ec2.Peer.anyIpv4(),
      ec2.Port.tcp(80),
      "Allow HTTP access from the world"
    );

    // Create an Amazon Machine image
    const ami = new ec2.AmazonLinuxImage({
      generation: ec2.AmazonLinuxGeneration.AMAZON_LINUX_2,
      cpuType: ec2.AmazonLinuxCpuType.X86_64,
    });

    // Create an EC2 instance using the AMI and Security Group
    const instance = new ec2.Instance(this, "Instance", {
      vpc,
      instanceType: new ec2.InstanceType("t2.micro"),
      machineImage: ami,
      securityGroup,
    });

    // Read the user data script from the file system
    const userData = readFileSync("../data/user-data.sh", "utf8");
    instance.addUserData(userData);
  }
}- In the
datafolder, create a file calleduser-data.shand add the following code:
This script will install NGINX and set up a simple website.
#!/bin/bash
yum update -y
sudo su

amazon-linux-extras install -y nginx1
systemctl start nginx
systemctl enable nginx

chmod 2775 /usr/share/nginx/html
find /usr/share/nginx/html -type d -exec chmod 2775 {} \;
find /usr/share/nginx/html -type f -exec chmod 0664 {} \;

echo "<h1>Simple EC2 website using NGINX</h1>" > /usr/share/nginx/html/index.html- In the
binfolder, in the generated fileload-balancing-aws.ts, add the following code:
#!/usr/bin/env node
import 'source-map-support/register';
import * as cdk from 'aws-cdk-lib';
import { LoadBalancingAwsStack } from '../lib/load-balancing-aws-stack';

const app = new cdk.App();

new LoadBalancingAwsStack(app, 'LoadBalancingAwsStack', {
  /* If you don't specify 'env', this stack will be environment-agnostic.
   * Account/Region-dependent features and context lookups will not work,
   * but a single synthesized template can be deployed anywhere. */

  /* Uncomment the next line to specialize this stack for the AWS Account
   * and Region that are implied by the current CLI configuration. */
  env: {
    account: process.env.CDK_DEFAULT_ACCOUNT,
    region: process.env.CDK_DEFAULT_REGION
  },
cdk-hnb659fds-cfn-exec-role-749710350214-us-east-1
  /* Uncomment the next line if you know exactly what Account and Region you
   * want to deploy the stack to. */
  // env: { account: 'your-account-id', region: 'your-default-region' },

  /* For more information, see https://docs.aws.amazon.com/cdk/latest/guide/environments.html */
});
Note that we are using the env property to specify the AWS account and region where we want to deploy the stack. So in the next step we will create a script to deploy the stack to our AWS account.
- To deploy to a specific environment we can create a script that will set the environment variables and then call the
cdk deploycommand. Create a file calledcdk-deploy-to-dev.shin the root folder of the project and add the following code:
#!/bin-bash
if [[ $# -ge 2 ]]; then
    export CDK_DEPLOY_ACCOUNT=$1
    export CDK_DEPLOY_REGION=$2
    shift; shift
    npx cdk deploy "$@"
    exit $?
else
    echo 1>&2 "Provide account and region as first two args."
    echo 1>&2 "Additional args are passed through to cdk deploy."
    exit 1
fi
And make the script executable:
chmod +x cdk-deploy-to.sh- If is the first project you are deploying using CDK in the region you are using, you need to bootstrap the environment. To do that, run the following command:
This command must be run only once per region and AWS account. Learn more about here.
cdk bootstrap --profile <your profile> --region <your-region>- Run the
cdk-deploy-to-dev.shscript to deploy the stack to your AWS account. You can find the script in the root folder of the project.
./cdk-deploy-to.sh your-aws-account-id your-aws-region --profile your-aws-profile- After the deployment is complete, you can see the EC2 instance in the AWS console.
- This is the output of the terminal:

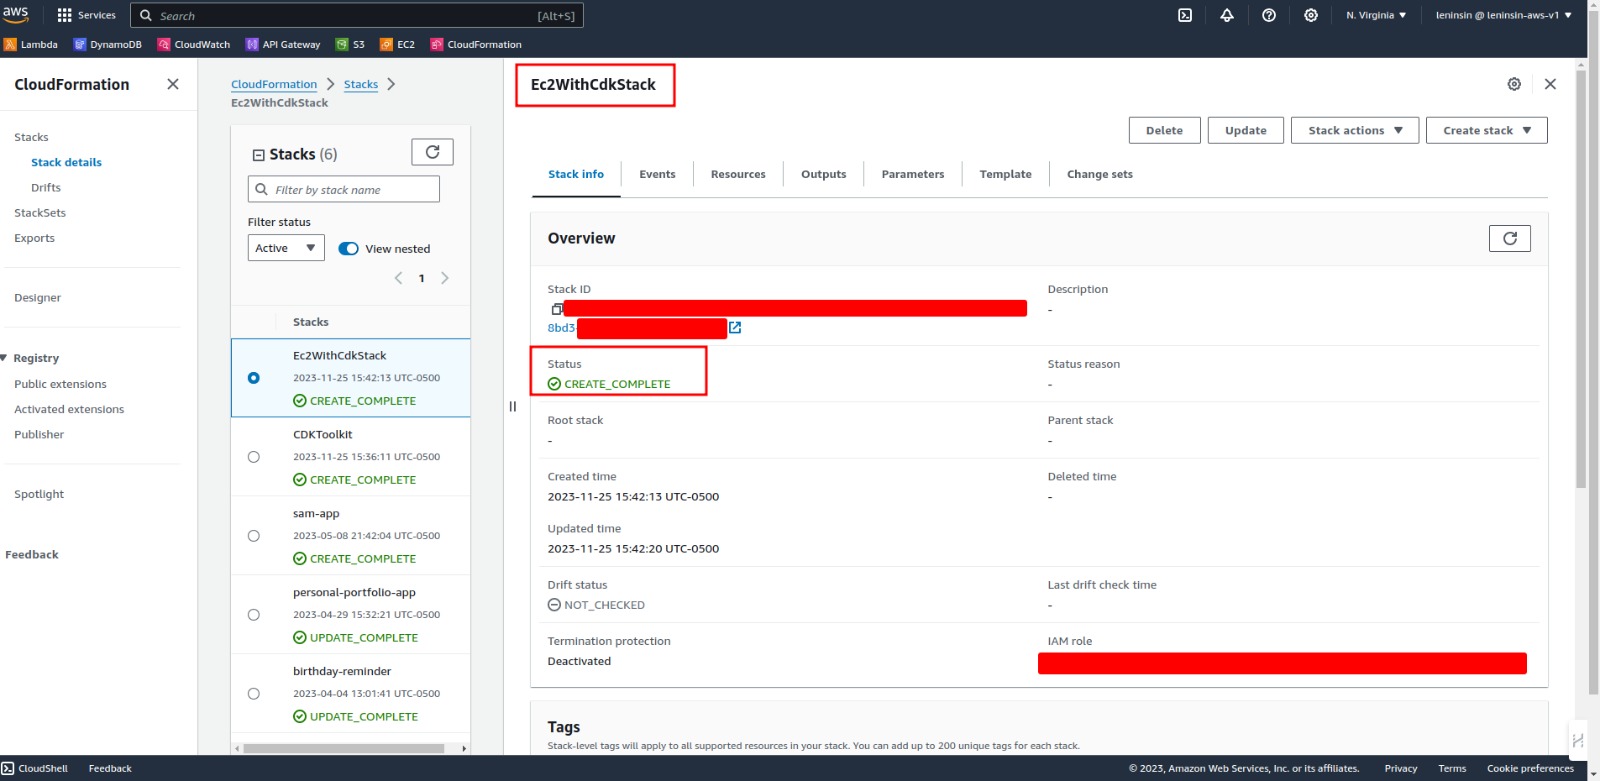
- This is the output of the AWS CloudFormation Console:

- This is the output of the AWS EC2 Console:

You can see the complete code in the GitHub repository.
Conclusion
EC2 is one of the most used services in AWS. It is a powerful service that allows us to create virtual machines in the cloud. In this post, we have seen how to create an EC2 instance using AWS CDK. In the next post, we will see how to create an EC2 instance using Terraform.